
I love these fantastic affordable embellishment organization notebooks that Janet from RTS Scrapbooking on Youtube came up with. She calls them color binders. They are easy and totally changed the crafting game for me. I love how they give me new crafty inspiration. I don’t have to flip through all my ephemera for hours and then clean it up. Totally worth the bit of set up time upfront. It’s portable and so easy to make. It only cost me a few dollars to make. A total crafty win!!! I’m a bit obsessed! My original notebook had the items better spaced. But now I know this project is a total win. Since I used basically all the items up in my first notebook, I transitioned to 3 notebooks now. I’ve place the items closer together, since I realize as I use them up, more space will appear between the items.
What You Need to make an Embellishment Organization Notebook…
All you need to make these organizers is:
- A plain simple notebook. *Also beware if you have a ton of items, these notebooks can bulk up quite a bit so make sure you don’t fill them crazy full. But they do easily hold quite a lot. 🙂
- Tombow 52180 Mono Aqua Liquid Glue
- iCraft Mounting Squares Permanent Adhesive
- Reynolds Kitchens Cut-Rite Wax Paper (Janet recommends Reynolds brand, she says some people have mentioned Dollar Store wax paper didn’t work)
- Your ephemera, stickers, and accessories
That’s it. Plain. Simple. Cheap. I’ll have the *affiliate links to these items on Amazon listed down below.
Hesitant about this system? I recommend trying it with a small amount of your supplies. I did and was amazed how well it worked. Years have passed and I’m not going back. 🙂 It’s a notebook full of joy and possibility!

Helpful Hints
This project is best done assembly-style, aka stick a bunch of squares on ephemera and then place on notebook paper in a way that fits each page. I started at the top and worked my way down. Lots of small things went at the bottom or in crevices left over from bigger pieces that were randomly shaped. The idea is GENTLY, easily remove them from the notebook sheets when needed so the whole thing shouldn’t be adhered down. (Also because the ephemera has the sticky on the back, there will probably be a little tear mark on the back of the ephemera (which you can see in my video). But if you are going to adhere it down on your future project anyway…
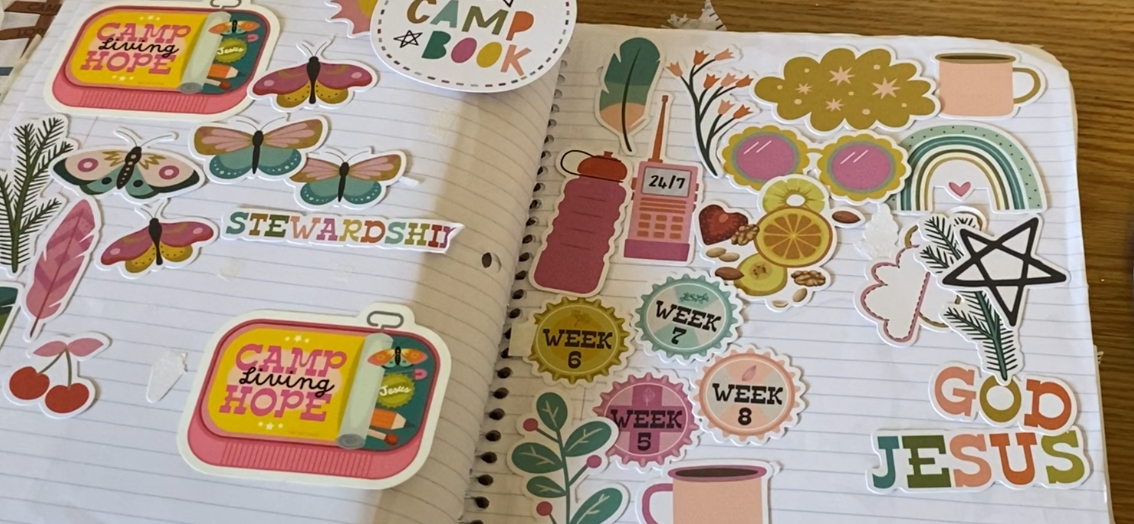
Ephemera / Sticker Sheet Assembly…
The photos squares are strong. Stick them on the back of each individual ephemera and adhere to the notebook paper. I like to put them on the back of a sticker sheet also and stick the whole sheet in. Sometimes I layer them so you can lift one sticker sheet and see another one beneath it. As long the second sticker sheet is place a bit lower, it works fine. Just remember you have to easily turn the page, so don’t get carried away with too many layers. 😉 1-2 squares will keeps a whole sticker sheet attached. For smaller pieces of ephemera and cost savings, I will totally cut or rip the squares into halves or even quarters.
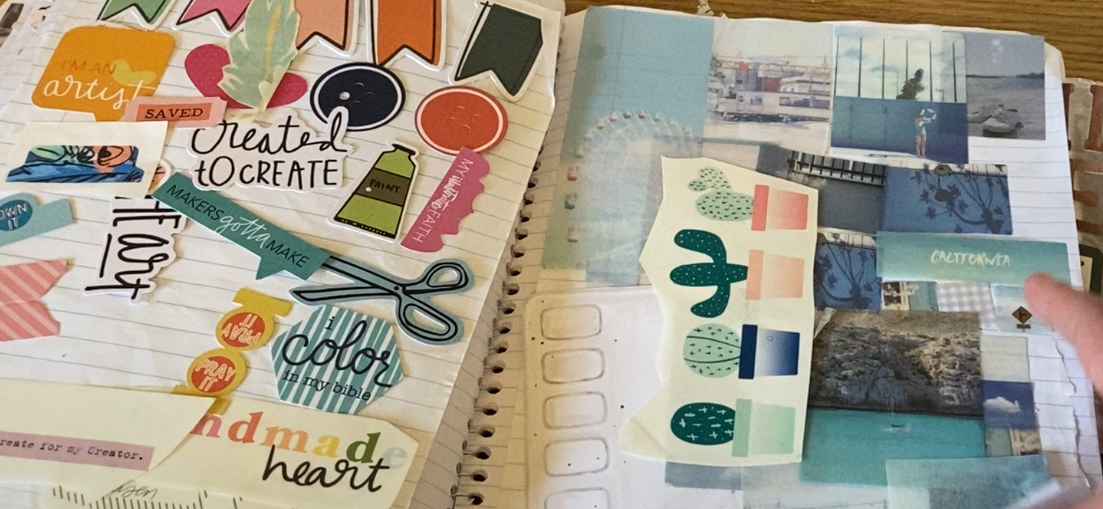
Single Stickers Assembly
This category involves 12×12 stickers sheets for instance, or if you only have a couple stickers left from a previous sticker sheet. All you do is cut wax paper about 8.5 x 11″ to fit one side of a notebook page with the shiny side up. Use the Tombow glue to place a small tiny line around the perimeter of the notebook page as well as a small dot in the center. From there, place the (SHINY SIDE UPWARD) wax paper on. Now you can easily transfer your stickers onto it. Afterwards, when you need to use them, they will peel up easily and usually be sticky still on the underside. Do you want to add all your washis for easy reference. Go ahead. 🙂 Also stick two notebook pages together if you need a sturdier surface to place your items on.

Reasons to love these crafty notebooks…
- These notebooks are super easy to update on your crafting journey whether your goal is to use up your stash or add more items/ bring in a new haul. Originally I had one notebook, and now that my supplies has grown and I know this method works well for me, I’ve gone to 3 partially filled notebooks. One is designated for Fall/Christmas/Winter. One for Summer/Spring. The last one is for different devotional kits since I Bible journal and want to access any kit at any time. #commitment problems lol.
- They are super portable for coffeeshop dates, art retreats, heck even backpacking or taking a vacation somewhere.
- Great for traveling on train, plane and car rides.
- You can organize your supplies however you like. Brand, Season, Color, Category.
- See everything you have together in the same book. So many times I’ve had new inspiration for seeing two items from two totally different collections. #craftsupplyslump be gone. Adding totally different textures and ideas together have helped me grow in my style as an artist/creator.
- Quick and efficient to use. Easy to find items.
- Offers flexibility. If you aren’t sure about an item, you can easily stick another sticky square on the back and replace it back in your notebook. Or honestly just wedge it between two other stuck on items.
- Terrific for planners, scrapbookers, Bujo, Bible journaling, paper-crafting, mixed-media, collage, sticker collectors etc.
- They take up zilch for space and stand up vertical, so if you have a small craft space, rolling cart, tote, tiny house, she-shed etc. Happy dance!!!
- I think this fits under simplicity and craft-supply minimalism too. 🙂

Check out the fall/winter Video flip thru here.
Check out the Original RTS Scrapbooking youtube video here.
*Amazon Affiliate Links Down Below
MACO Full Sheet Clear Matte Printable Labels – Laser/Ink Jet Compatible Craft Labels, – https://amzn.to/40hK8in
Reynolds Kitchens Cut-Rite Wax Paper, 75 Square Foot Roll – https://amzn.to/4eEYYUt
iCraft Mounting Squares Permanent Adhesive, 750 Count, 1/2 Inch, White – https://amzn.to/4eNKAZH
Tombow 52180 Mono Aqua Liquid Glue – https://amzn.to/3ZMphmJ
Mead Spiral Notebooks, 6 Pack, 1 Subject, College Ruled Paper, 7-1/2″ x 10-1/2″, 70 Sheets per Notebook, Color Will Vary – https://amzn.to/4elzFGA
(*Affiliate links mean I get a commission at no extra cost to you.)
Check out my Craft Room Tour HERE.
Or my Revolutionary other #1 Organizational Craft Supply Tool HERE
Let me know any questions, crafty hacks or thoughts you have down below. Thanks for reading. 🙂
These color binders are such a game-changer for crafting! They make organizing ephemera so much easier and inspire new creative ideas. I love how portable and affordable they are—totally worth the setup time. The assembly-style approach is clever and efficient. Do you think this method could work for other types of projects beyond scrapbooking?