
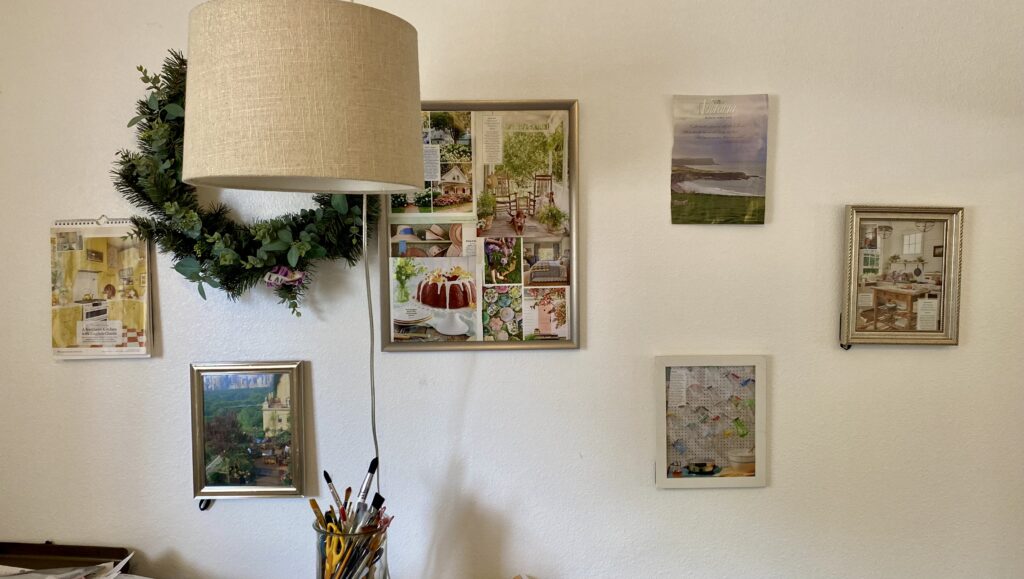
Here is how I made a gallery / inspiration wall I love. I can change it up for fun new inspiration whenever I want. It’s super easy and affordable. The sky is the limit. It feels super personal to me and who I am and what my goals are at the moment. And perfection is out the window.

My Goal
I recently wanted to make a gallery wall above my craft desk. I don’t have a window there and wanted something pretty and inspirational to look at to inspire me when I craft. But I was a nervous beginner and had no idea what to make and what if it didn’t look right? Or worse, looked right but didn’t actually feel true to me? I don’t know about you, but I have a hard time sometimes finding art that I just adore, although it does happen occasionally. I also wanted it to be easy to adjust seasonally and FUN. Good for small spaces and larger ones in the future.
Finding Frames
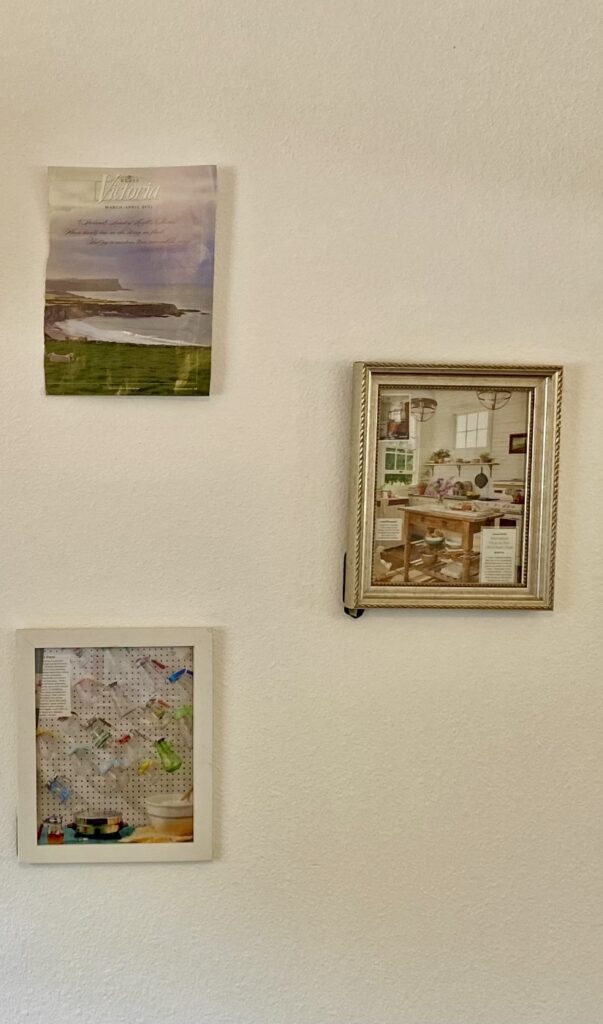
I headed to Goodwill and found different affordable frames I liked. Next, I found a spot I could try laying them out at the store (on one of those carpeted risers) to find a good layout. I already knew what wall and measurements I needed. The wall was tall and thin, (Spoiler alert, I have since moved and these same frames go great in other layouts too.) I chose eclectic frame styles with a variety of white, black silver and gold that I could mix. I usually tend to go with gold or silver. Also, I reuse the backs of old taller calendars to display my new images on. I just glue them on. They already are ready to hang, and you can then flip to another page for another gallery wall image. Consider not having a frame for some of your images too.
My Go-To Materials
I did search online for downloadable prints and considered buying them, however since funds were really tight and I don’t own a color printer…So I prayed for wisdom and started looking around at what I already had for inspiration. Some budget-friendly things that caught my eye were:
- My calendar, full of images I loved.
- A book with some neat images my mom offered me that she had already started to tear apart for another project.
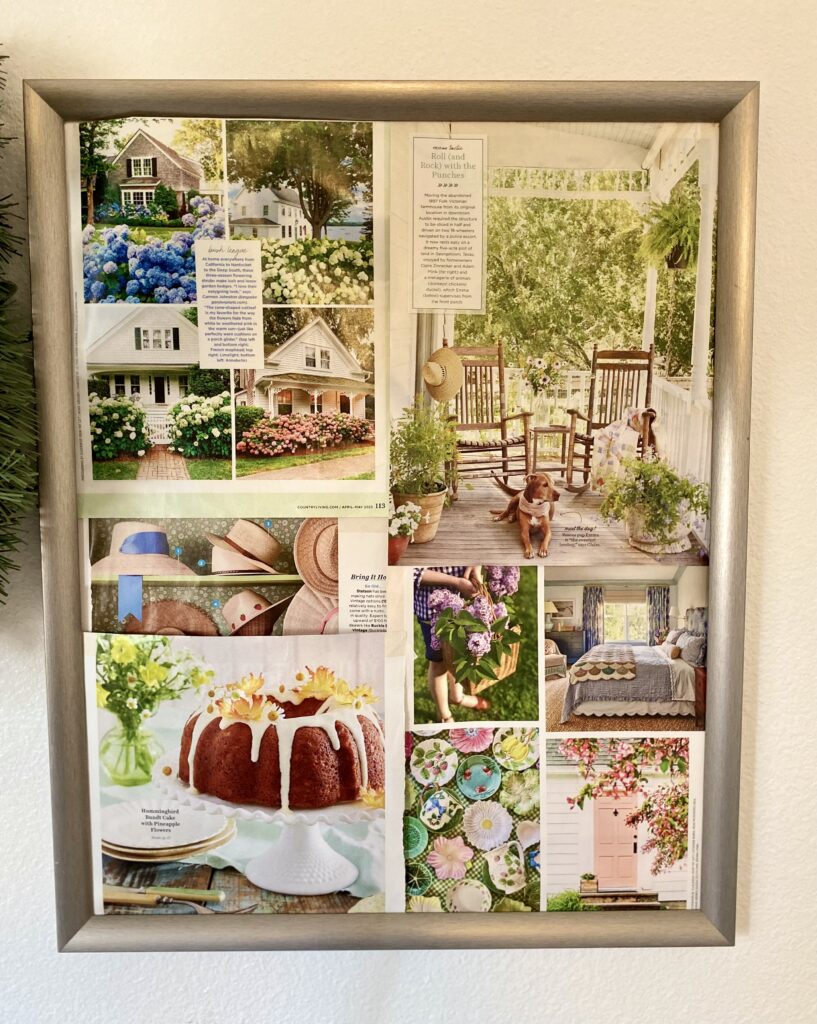
- Some magazine images
- Photos you’ve taken that you can have printed larger at a print shop.
- Printables
- Vintage maps
- Patterned Paper / Wallpaper Samples
- Inspirational Sayings
- Sheet Music
- Art you create yourself. (There are tons of really easy how-tos on Pinterest, Youtube, Skillshare and Google.)
- Pinterest Images (Beware if you print something off of Pinterest, the quality might not be as good if you have to expand it really big, but you can also collage some items together to fill a bigger frame too.)
- Or if there’s a postcard or print from Etsy, Ebay, Other stores you love… any and all of these can be included.
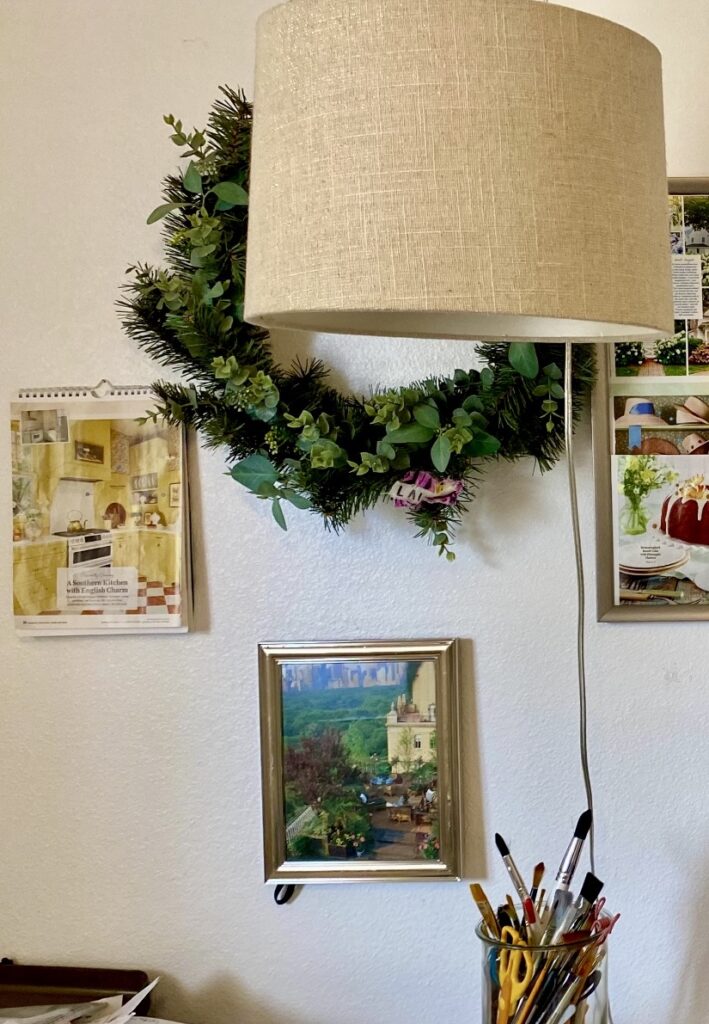
- Plants (like a fake wreath) and lighting are fun add-ons too.

A Common Theme
Also you want to decide if you want your images to tie together somehow which can help with the overall end results. For me, a fun way to do this is making it seasonal. Surprise! Surprise! If you know me, that’s my go to lately. But it works for this, craft supplies organization, excess clothes, reading materials, a goal of yours, etc. Or you could chose a color scheme, theme, art medium like watercolor, oil prints, black and white, a place, a person, or even a favorite movie or show can have fun elements that really inspire.

Assembly
Now it’s time to start flipping through what you have and finding items that really inspire you. Also, these neat materials is that they are cheap and great for reuse, in a multitude of ways. Once you’ve decided on your materials, add them to your frames. (Also consider that you might want certain frames in different areas to provide visual appeal. For instance I’ll put a gold frame next to a black or white frame for contrast, vs next to another gold frame. You can add in a wreath or something non-framed for interest too. Don’t be afraid to get creative. I found a lot of smaller fall images, but none of them fit a frame, so I decided to take a bigger frame and using stick glue place make a collage. I can carefully remove them and reuse them some other way. Like in a junk journal or playbook. 🙂

Finally
Don’t be afraid to mix it up and have fun. The more you do it and experiment with it, the more you’ll find you get the hang of it and develop your own personal style. And at the end of the day it shouldn’t be what others define as perfect for them. It should be what you define as perfect for you. You make the rules. I’d love to hear your thoughts in the comments down below. What are your favorite items to display in a gallery wall?
Leave a Reply